October 2020
PLASTERING
With about 5 months after the last Lockdown being lifted, it looks like life is back to normal.
The main part of October is all about finishing up Plastering and Skim Coating works.
You see all this while, our little mice were pretty unenthusiastic about doing something called WORK. There was not much interest in them to get up and move an inch even when their fellow countrymen like the Roof Installers were around, showing them true work ethics on site.
When it came to the Plastering though, there was life in them. There was a bunch of happiness and they really plastered well. A little too well. Ridiculously too much in some cases in excess. I am talking about up to 2 inches in thickness of plastering in some cases.
Their workmanship was at their best and these dudes were not making many shortcuts. Till today in 2024, we still get comments on how good the finishing is on our walls.
Yes we have some paint issues and dampness in some areas on the walls but their plastering work, something else.
In a case such as ours, I will say that these workers of ours, had their hands skilled only for plastering work. They were shit at brick work and levels, even when it came to picking up stones from the garden, but their greatest highlight was Plastering.
So then I realized at this late stage, that these workers are actually Plaster experts. They are not excellent at fabricating staircases, or laying bricks, or any of the work that was required to build our place. So I let them shine, not interrupt them much and let them do their thing. Even when it came to the Plaster ceiling work, it was well done. Skimming was really good as well.
The outside had all been plastered by now. Notice we added window sills like the old fashion way ? We had many designs but we chose this type. It adds some depth to the Home, than being a typical ugly square. Our sills protrude out by 300mm to give enough depth visible around the windows
This is our 1st floor skylight and where our hall is
Nice shot here of very smooth walls
The master Bedroom here almost done with its finish
Bathroom 1 upstairs is a long and narrow bathroom, 5 x 15 feet. Our bathrooms are all very large. The bathroom also has a good view of trees
Downstairs works being done
Never seen them all work like this at one go happily. This is when I knew, they are really just Plaster workers
Thats all for Plastering and Skim Coat-ing. The next step will be the installation of WINDOWS done like below
BALCONY RAILINGS
November - December 2020
Did that help with Rust ? Absolutely NOT !
Now we have finished with RAILINGS, we are able to get a Glimpse of what the Property may look like in future once Primer is laid. The Prime Coat of course is white, and while you think that we would be doing a Balakong Grey, it wasnt going to work for us.
Coming out of the first MCO, we had taken a slight dive in our expenses and we decided that instead of using Aluminium for our Railings, we would just fabricate them at our factory by using Steel tubing. We didnt do any Hot Dip Galvanizing or Zinc Plating at all which would be regreted later, but redeemed again in 2024 in a big way.
We decided to put this together with whatever materials we had and not invest unnecessarily at this time. So Round Steel Tubes and 6mm flat bar it was.
While we had Aluminium Tubes available for us, at that point in 2020, I wad adamant that unless I had the right Aluminium Tubes, these steel ones would do and we didnt have to spend anything more than what we already have. I should have just taken the Aluminium Tubes that we had that had a kind of a Fluted design on them which I finally did in 2024 as the tubes from a T52 Tensile became a T6 after 4 years. That just means, for you wise lowyat folks, that my tubes that were once bendable to be used on furniture, became unbendable and rigid, so even if I had tried to bend it for furniture us, they would have broken. So in 2024, I took them instead to replace my badly rusted railings that I am making here in 2020.
There was another serious issue with us, and that was our Powder Coating Blower Fan was damaged and its not like you can go to the shop and ask for one like a like lowyater who has clear ice cubed whiskys every evening.
So I couldnt give these railings the best treatment with what I could have done in house. Instead, I had to use this old fashion way to get this done, and as swiftly as possible.
I made a simple wooden jig, and got it welded by hand. Also, we had orders that need to go out while MCO 1.0 had delayed things, and tiling works had already started inside (which I will leave for the next part for your Lowyaters who love recommending tiles to read)
The steps done for finishing these Railings were :-
1. Fabricate
2. Degrease Surface
3. 2 Coats of Iron Oxide
4. 2 Coats Oil Paint
By now our tilers were ready to start works on our Balcony, and railings were not ready in time
Flat Bar being delivered, we already had 15mm Round Tubing that was not used
Tubes cut to 900mm / 3 feet approx in length and Degreased ready for Fabrication on a simple Jig
Heres my simple Plywood Jig that I made as a base
I applied wood Spacers in between and this Jig was able to do at any time a length of 6 feet and more worth of railings. The railings would come in sections, and connected together on site by welding them. Which was a messy bad job in the end, redeemed in 2024 in another posting later
Welding Works
Ok la,...not bad the Welding works, Im sure Lowyat kids will be able to advise how to weld better. Like wire speed, Ampreage, Voltage, Beading, Wire Thickness, Crater Time etc,...kan ?
Laying out of Railings so they can be Degreased before painting
Degreasing to remove oil and Debris off surface
Spraying 2 Coats of Iron Oxide in Green as an Anti Rust surface. Yes, Lowyaters would have done this in Chrome instead
Drying time, it looked really good against the White. This Forest Green colour still is a favourite for me till today
We used a good healthy thick layer without any thinner to ensure the best we could do for Anti Rust treatment
2 coats of White to help with Oil Paint
Drying Time in the not so hot Sun in November best we can
And here we are installing them slowly,... key word,...slowly, because our people are slow,...
Notice that the tiles are being installed ? We would regret this later as well though we LOVE our tiles
Done
Ok Laaa, boleh tahan. Being at a railing height of 42" / about 1068mm in height, it compliments the Buildings height. Later in 2024, we will make our new railings from Aluminium and at a lower 900mm Height which will be for another posting
Just plain good old Nippon 1001 White was going to be used for us later.
Lets take a look at a glimpse of what the house is going to look like Painted below with an Undercoat !!!
UNDERCOAT
January 2021
.
By this time, its December and the year 2020 is going to come to an end. The end is in sight, and by now even the tilers are in full swing and we will cover this topic in part 7 which will be specially dedicated to bathroom fittings and tiling works.
However, welcome to the year 2021 ! Happy New Year ! The year of 2 Lockdowns ! and 1 is just around the corner !
27th January - Early March 2021
Primer is Delivered
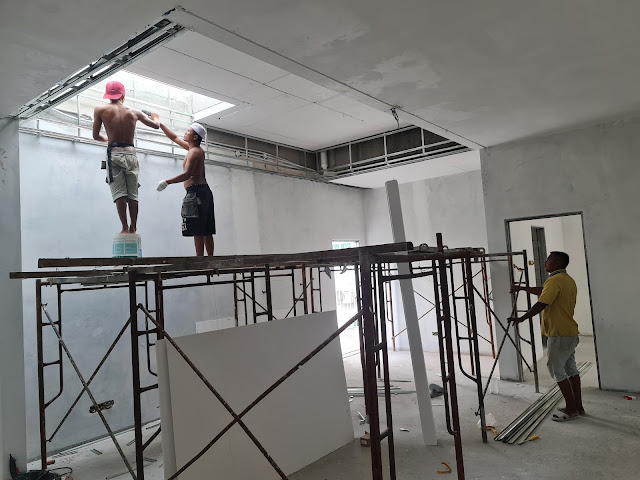
Here comes the plaster ceiling work
Inside, Plastering Ceiling Works had started as the Building is secure with Doors, Windows and Skylights installed. Yes, 3 people are needed. 2 to work, 1 to watch =)
No Cornices here, no Cherasville Grey, just a blast of White all around
I wanted to accentuate the height here so that the hall upstairs feels tall, and a bit more of warm air rises. So our First floor is 12 feet in height, and adding 1.5 feet of the Beam makes it 13.5 feet, and adding another 0.5 feet for the concrete slab makes it 14 feet. So we do see layers of how this has happened, but it gives a really tall look, and helps heat rise further
Over here is a narrow wall at the staircase next to the skylight in the hall upstairs, here, I will add a single light that will have a huge 3.5 x 14foot Painting made by me, wifey, my nephew and niece inspired by Jackson Pollock
Downstairs, the works are also almost done, and we have a pillarless design of course to the property. The main spaces are only 15feet in width, not 20, we kept our footprint small because we want to have space for a Garden as well. Not some small tiny 5ft width garden that looks as miserable as a 14 year old kid hitting puberty
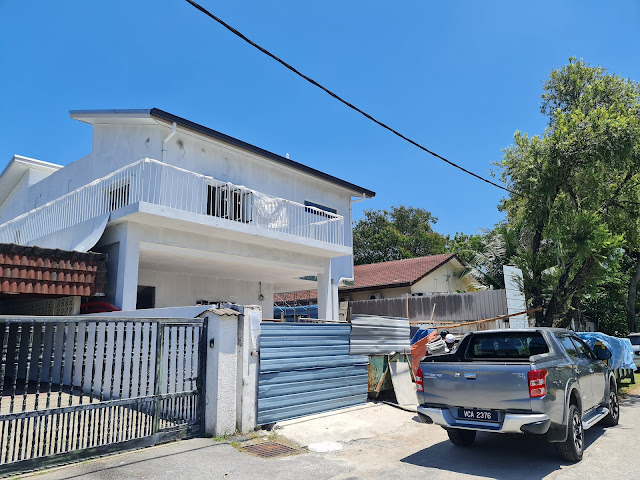
On the outside, this is how its shaping up. and here is a glumpse of what things are beginning to look like. I know many people are upset that we are not going with Grey =)
Ok lah, at least I can imagine what the colours are going to look like
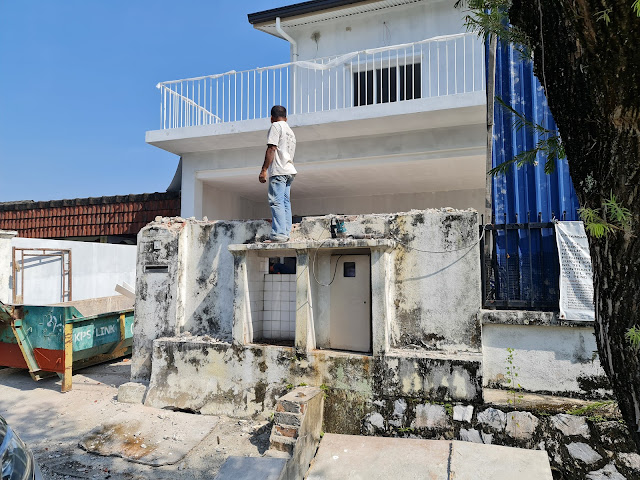
Here, we have the front wall that will be totally demolished, and rebuilt, which will feature Ventilation Blocks, which eventually became a fad 2022 onwards. Now ventilation blocks are everywhere.I was hoping they would not become popular
Next will be Windows, and Paint in Part 7. Wont touch on Windows much, but Paint Yes


No comments:
Post a Comment